Installing Cormas
Cormas is an agent-based modelling and simulation platform running on top of the Pharo programming environment. To install Cormas, you must first install Pharo, create a new image, and then run the installation script to load Cormas. This chapter will guide you through this process.
If you are not new to Pharo, just run this script in the Playground and you're done 😄
Metacello new
    repository: 'github://cormas/cormas';
    baseline: 'Cormas';
    load.
Installing Pharo
The steps below will help you install Pharo Launcher and create a Pharo image. If some of those steps fail on your computer, please contact us on Discord (see How to get help). If you are an advanced user, you can also try to install Pharo from command line or download the standalone packages by following the instructions on https://pharo.org/download.
Step 1: Install Pharo Launcher
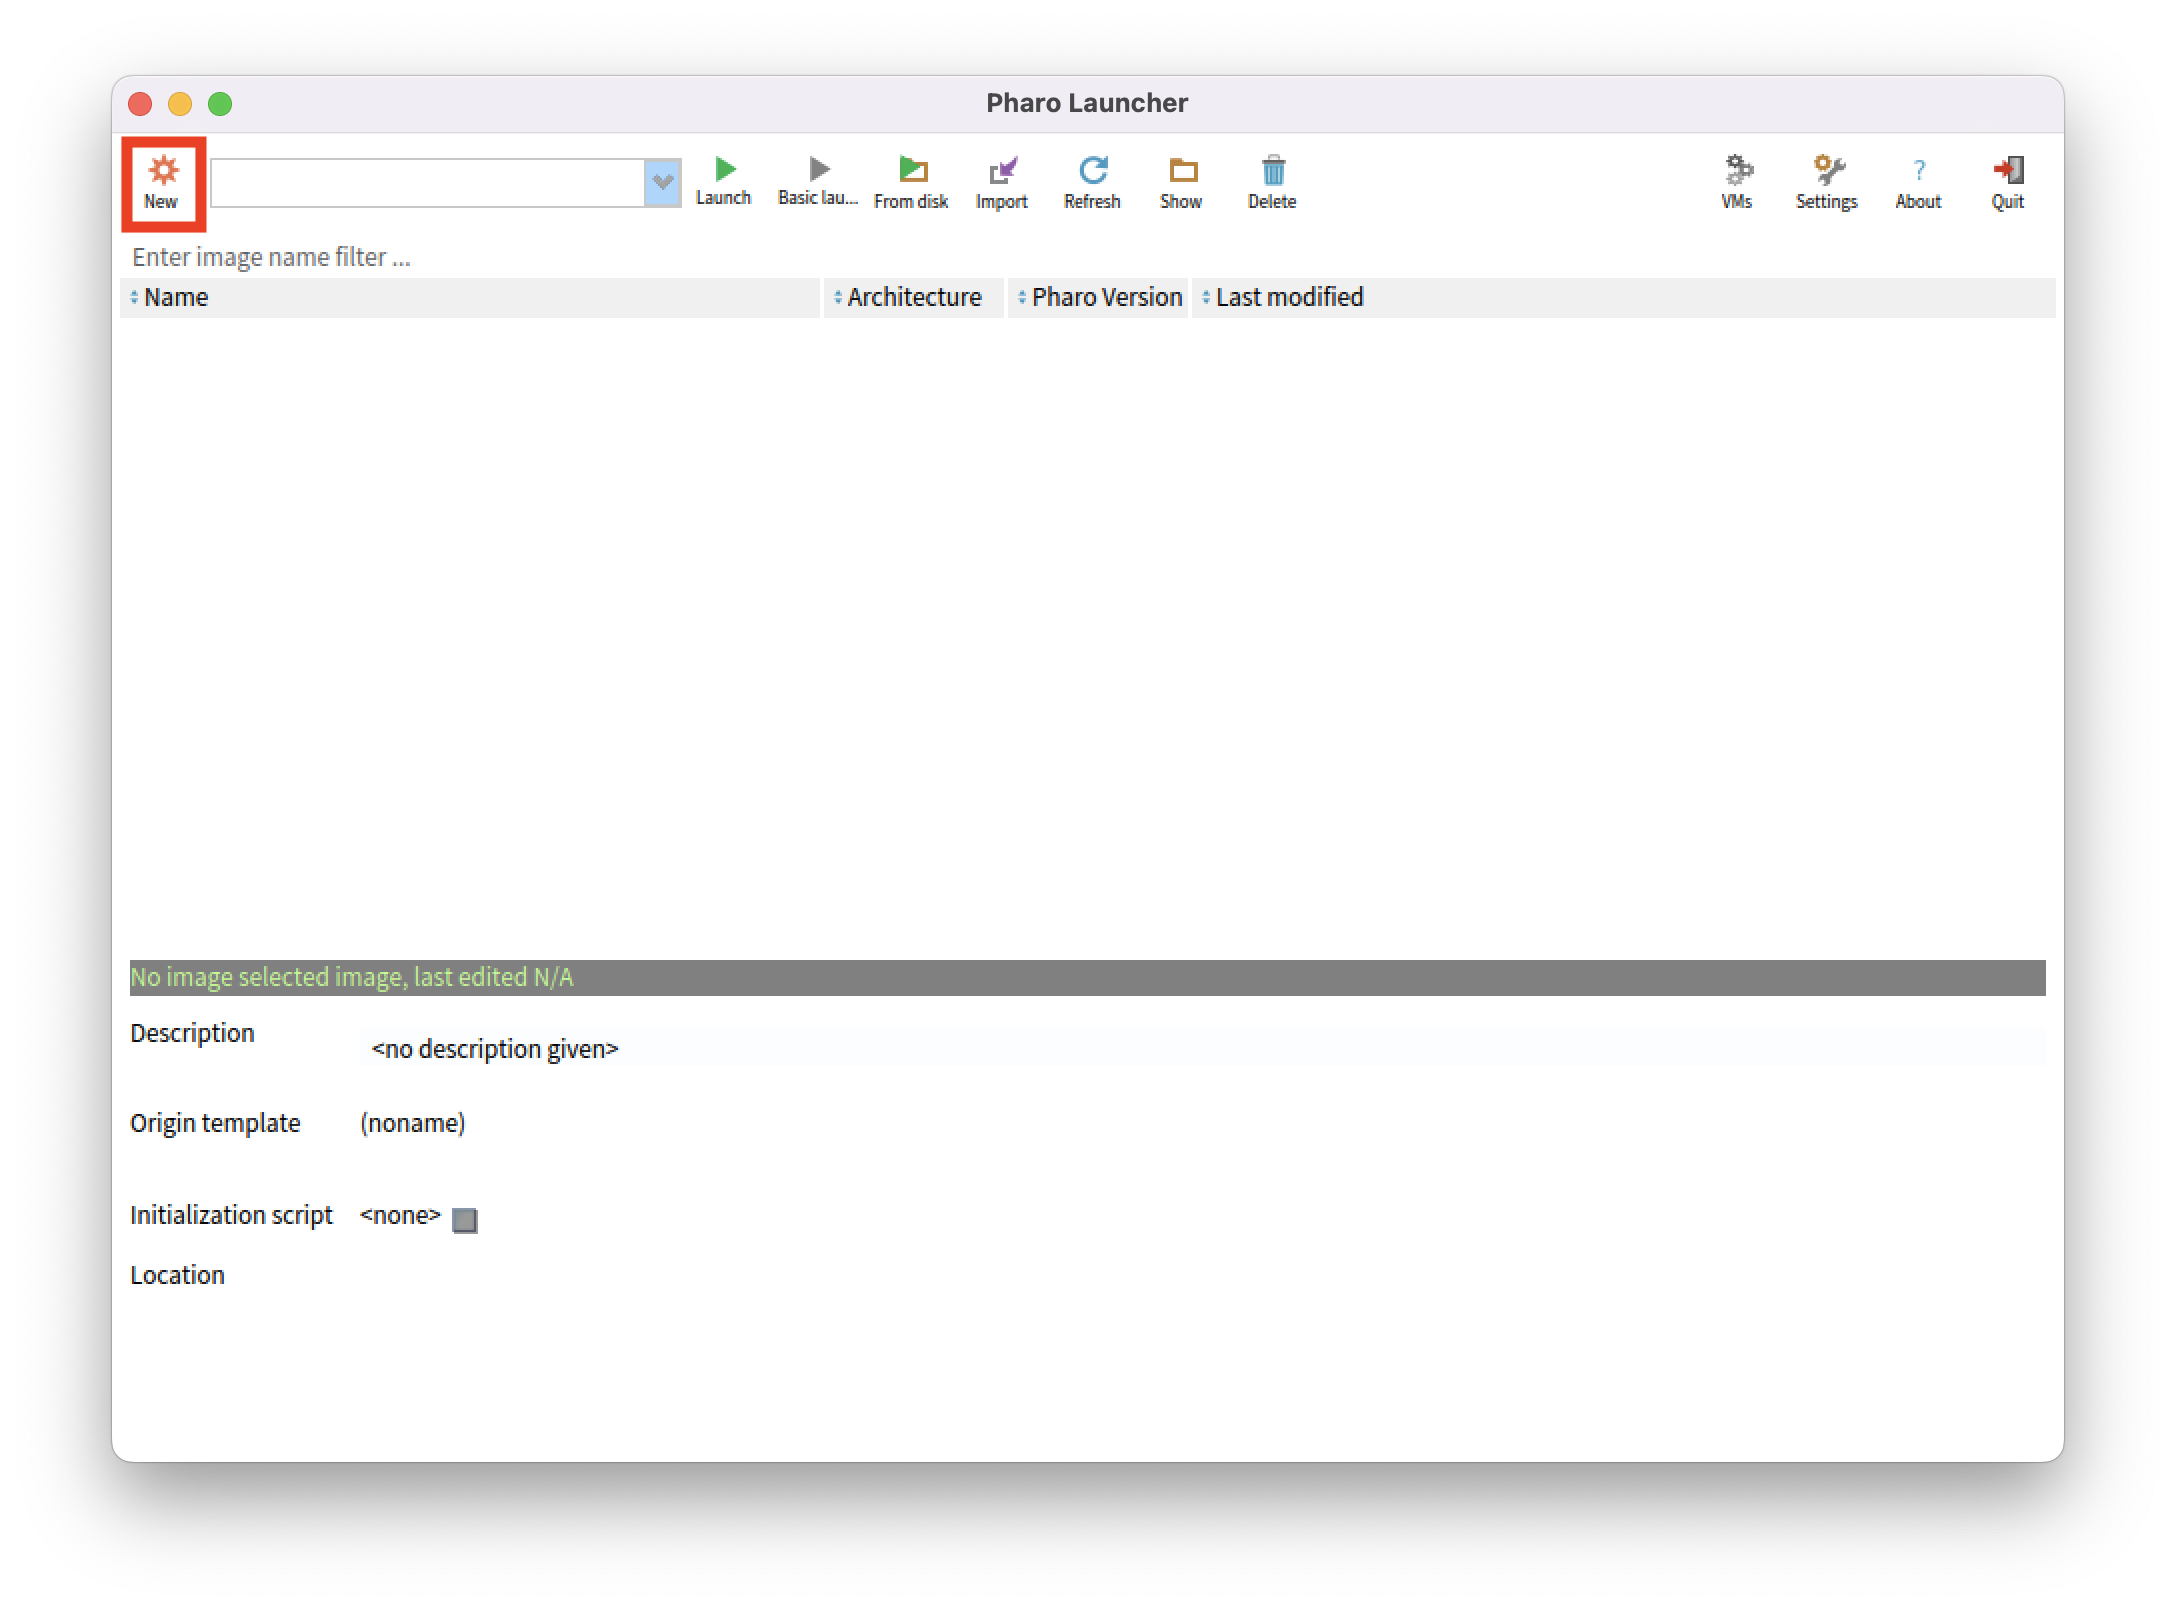
The easiest way to install and run Pharo is with Pharo Launcher - an application that can be used for creating and managing Pharo images. It can be downloaded from https://pharo.org/download. Follow the instructions on the website to install Pharo Launcher on your computer. Once the installation is complete, open Pharo Launcher. You should see the window similar to the one below. Click on the "New" button to create a new Pharo image.
Step 2. Create a Pharo image
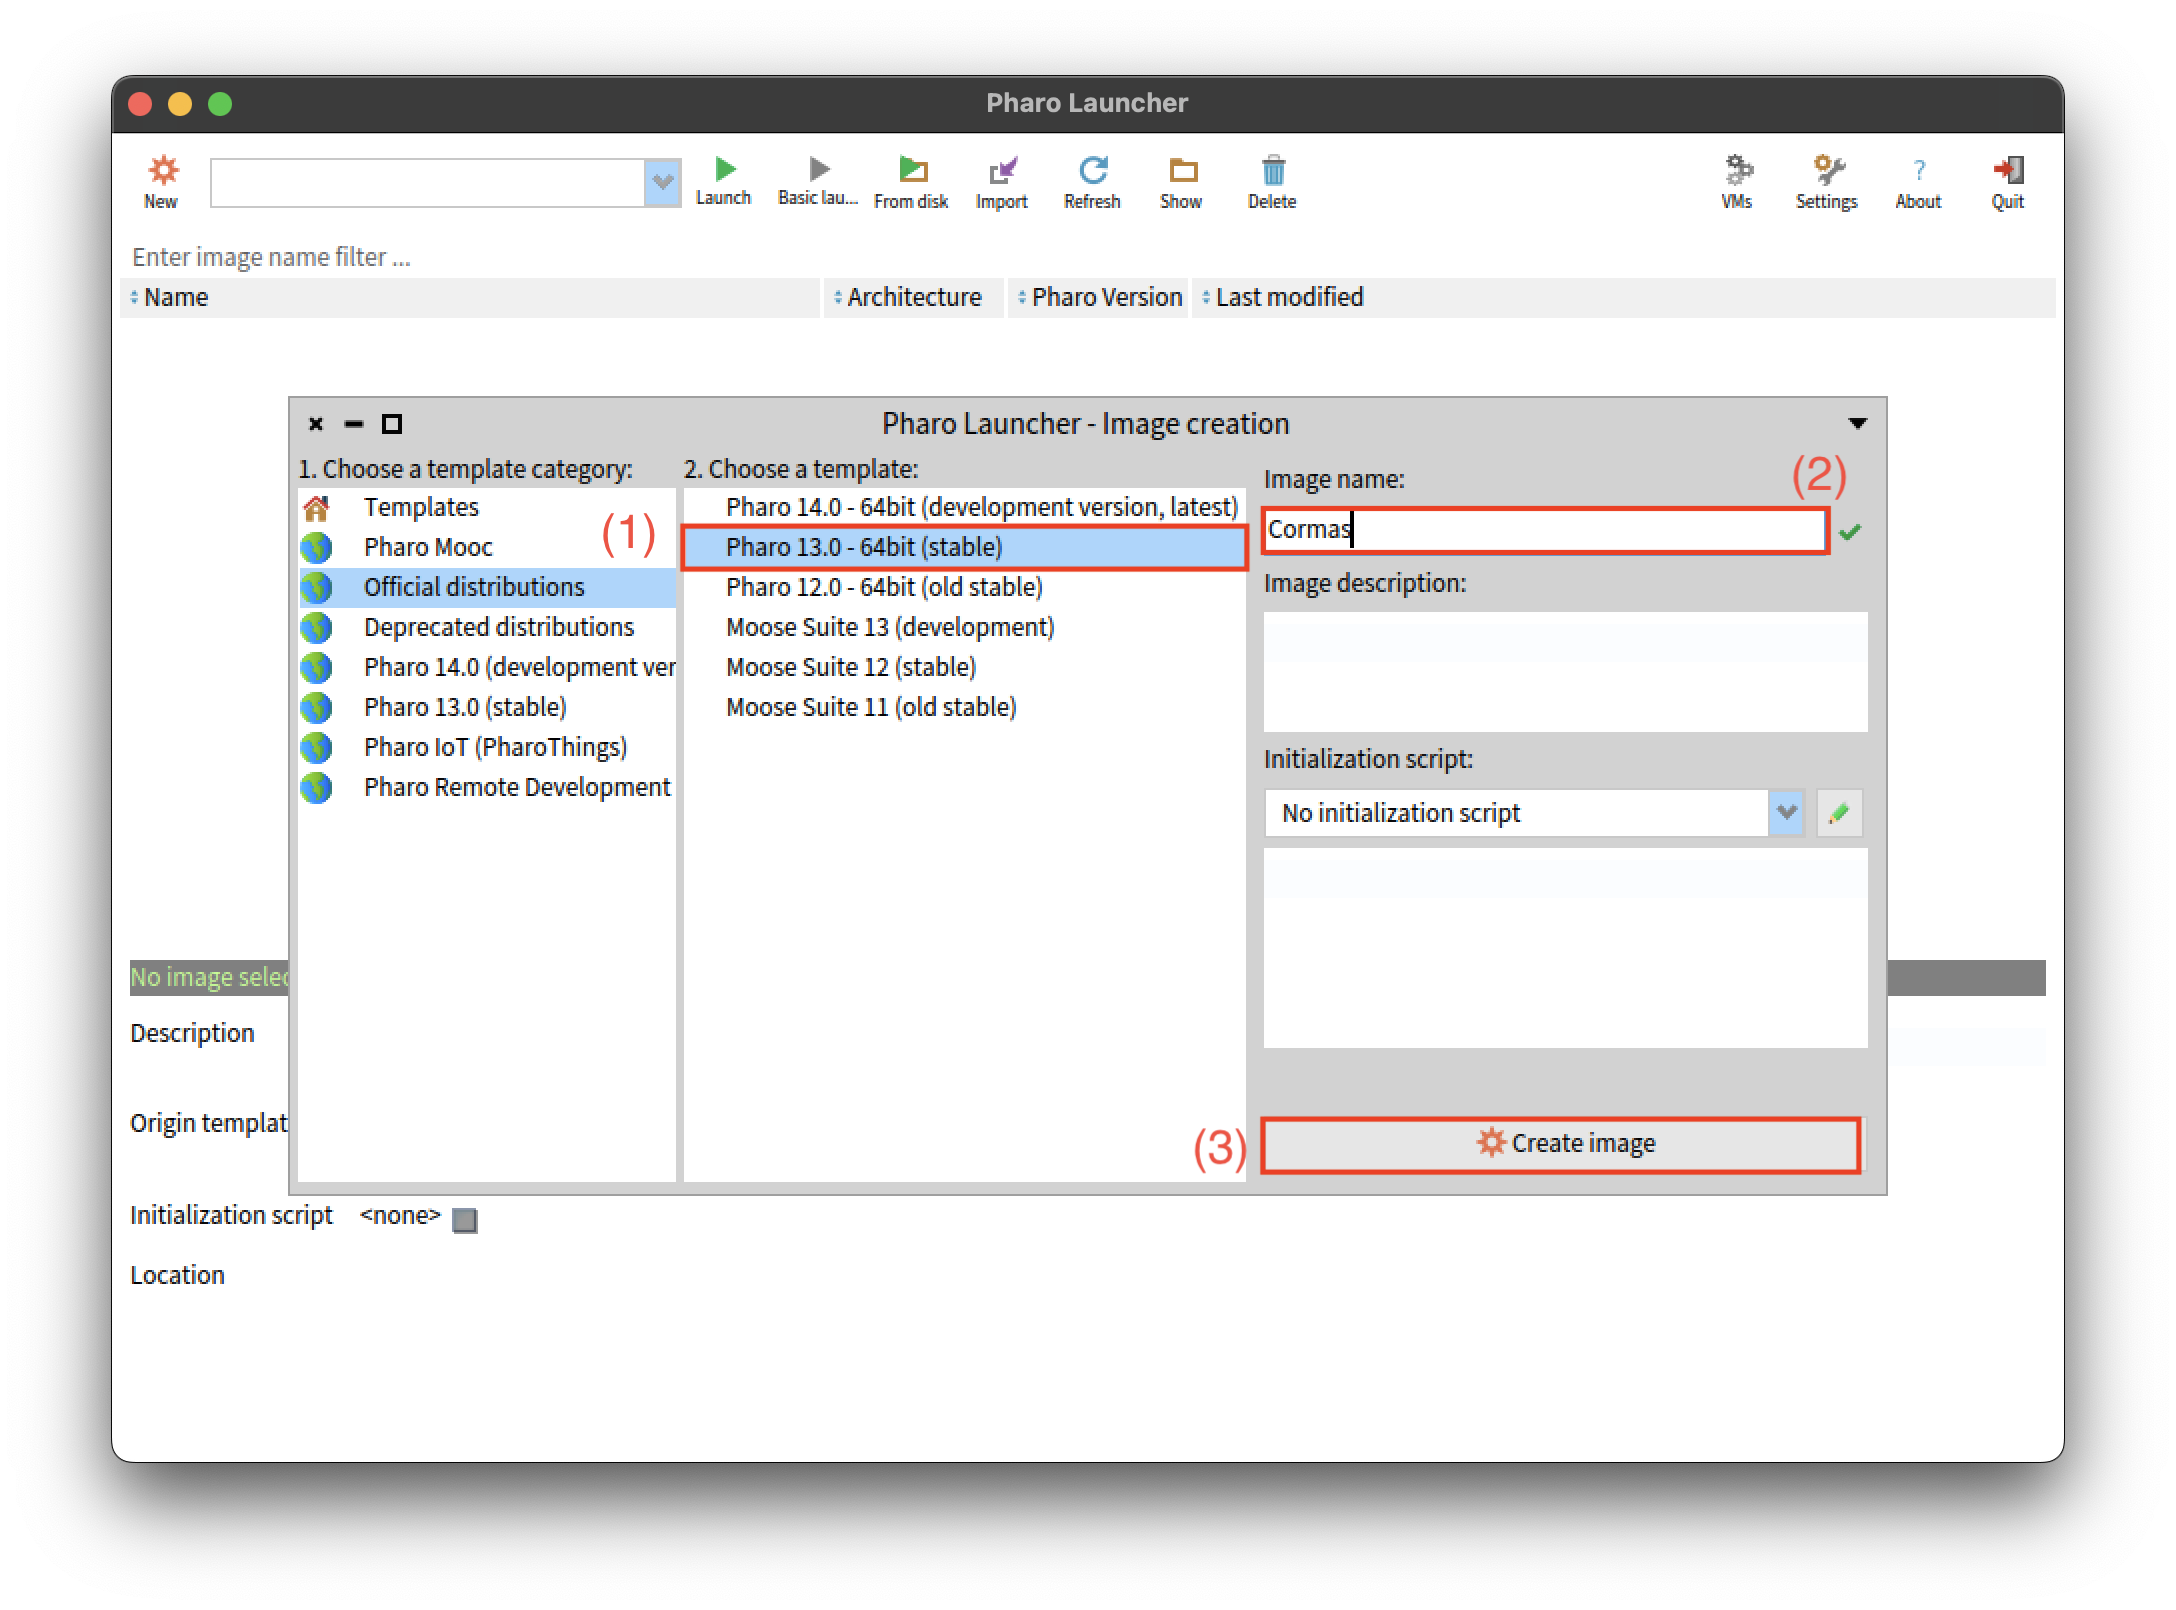
Cormas always supports three latest versions of Pharo: the development version (at the moment, it's Pharo 14), the stable version (Pharo 13), and the old stable version (Pharo 12). We recommend you to always use the latest stable version, in this case, Pharo 13. In the dialog window of Pharo Launcher, select the version of Pharo (1), give your image a name (2), and then click on the "Create image" button (3).
Pharo Launcher automatically detects the architecture of your processor: 64-bit or 32-bit. In case if you see both types of images offered to you by Pharo Launcher, you must manually check what of processor you have. Most modern computers have 64-bit processors.
Step 3. Open your image
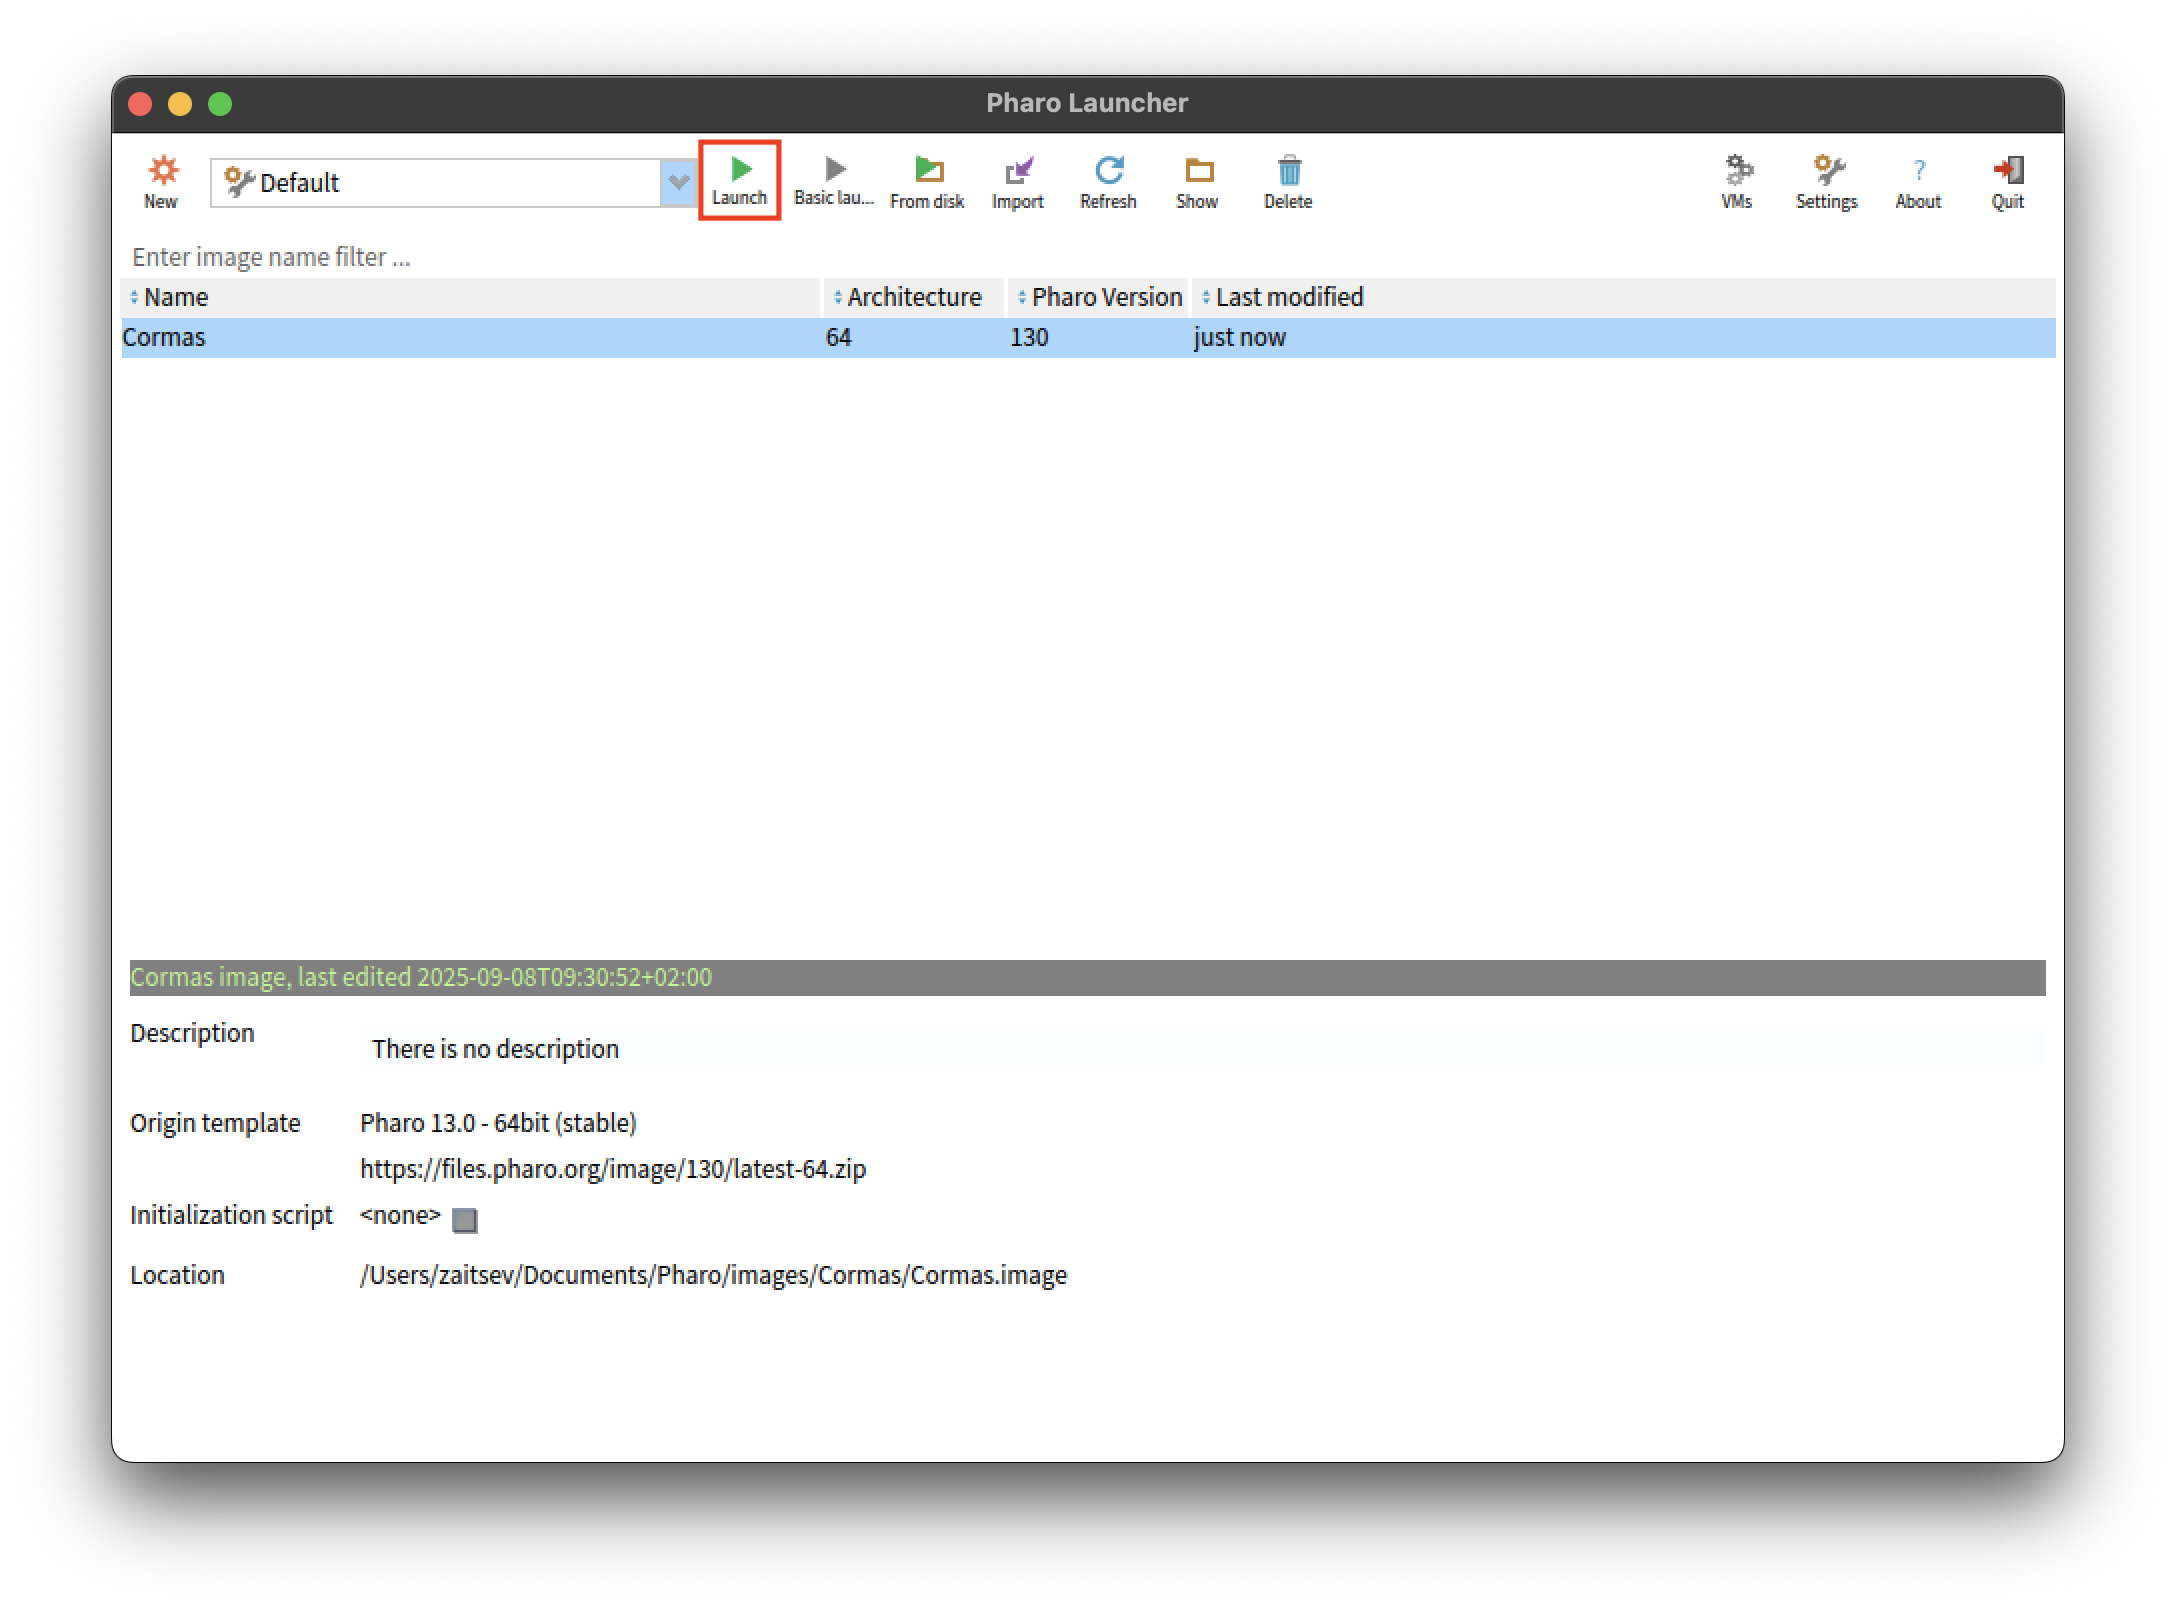
When new image is created, it will open automatically. If it didn't, or if you are opening Pharo for the second time, you can open your image simply by double-clicking on it or by selecting it and clicking the "Launch" button in the top menu.
Once your new image opens, it should look like the one in the picture below. The "Welcome Window" provides you with learning resources and allows you to make some basic configurations (e.g., choose the Dark Theme). You can navigate it by clicking the arrow on the right. Once you have familiarized yourself with the "Welcome Window", feel free to close it and continue this tutorial.

Loading Cormas
You will load Cormas into this image by executing the installation script. To do that, you must open the Playground - a standard Pharo tool for executing code. We do not program in Playground (for that, we use the System Browser), but we often use it to play with things, and run different scripts such as the installation script that you will see below.
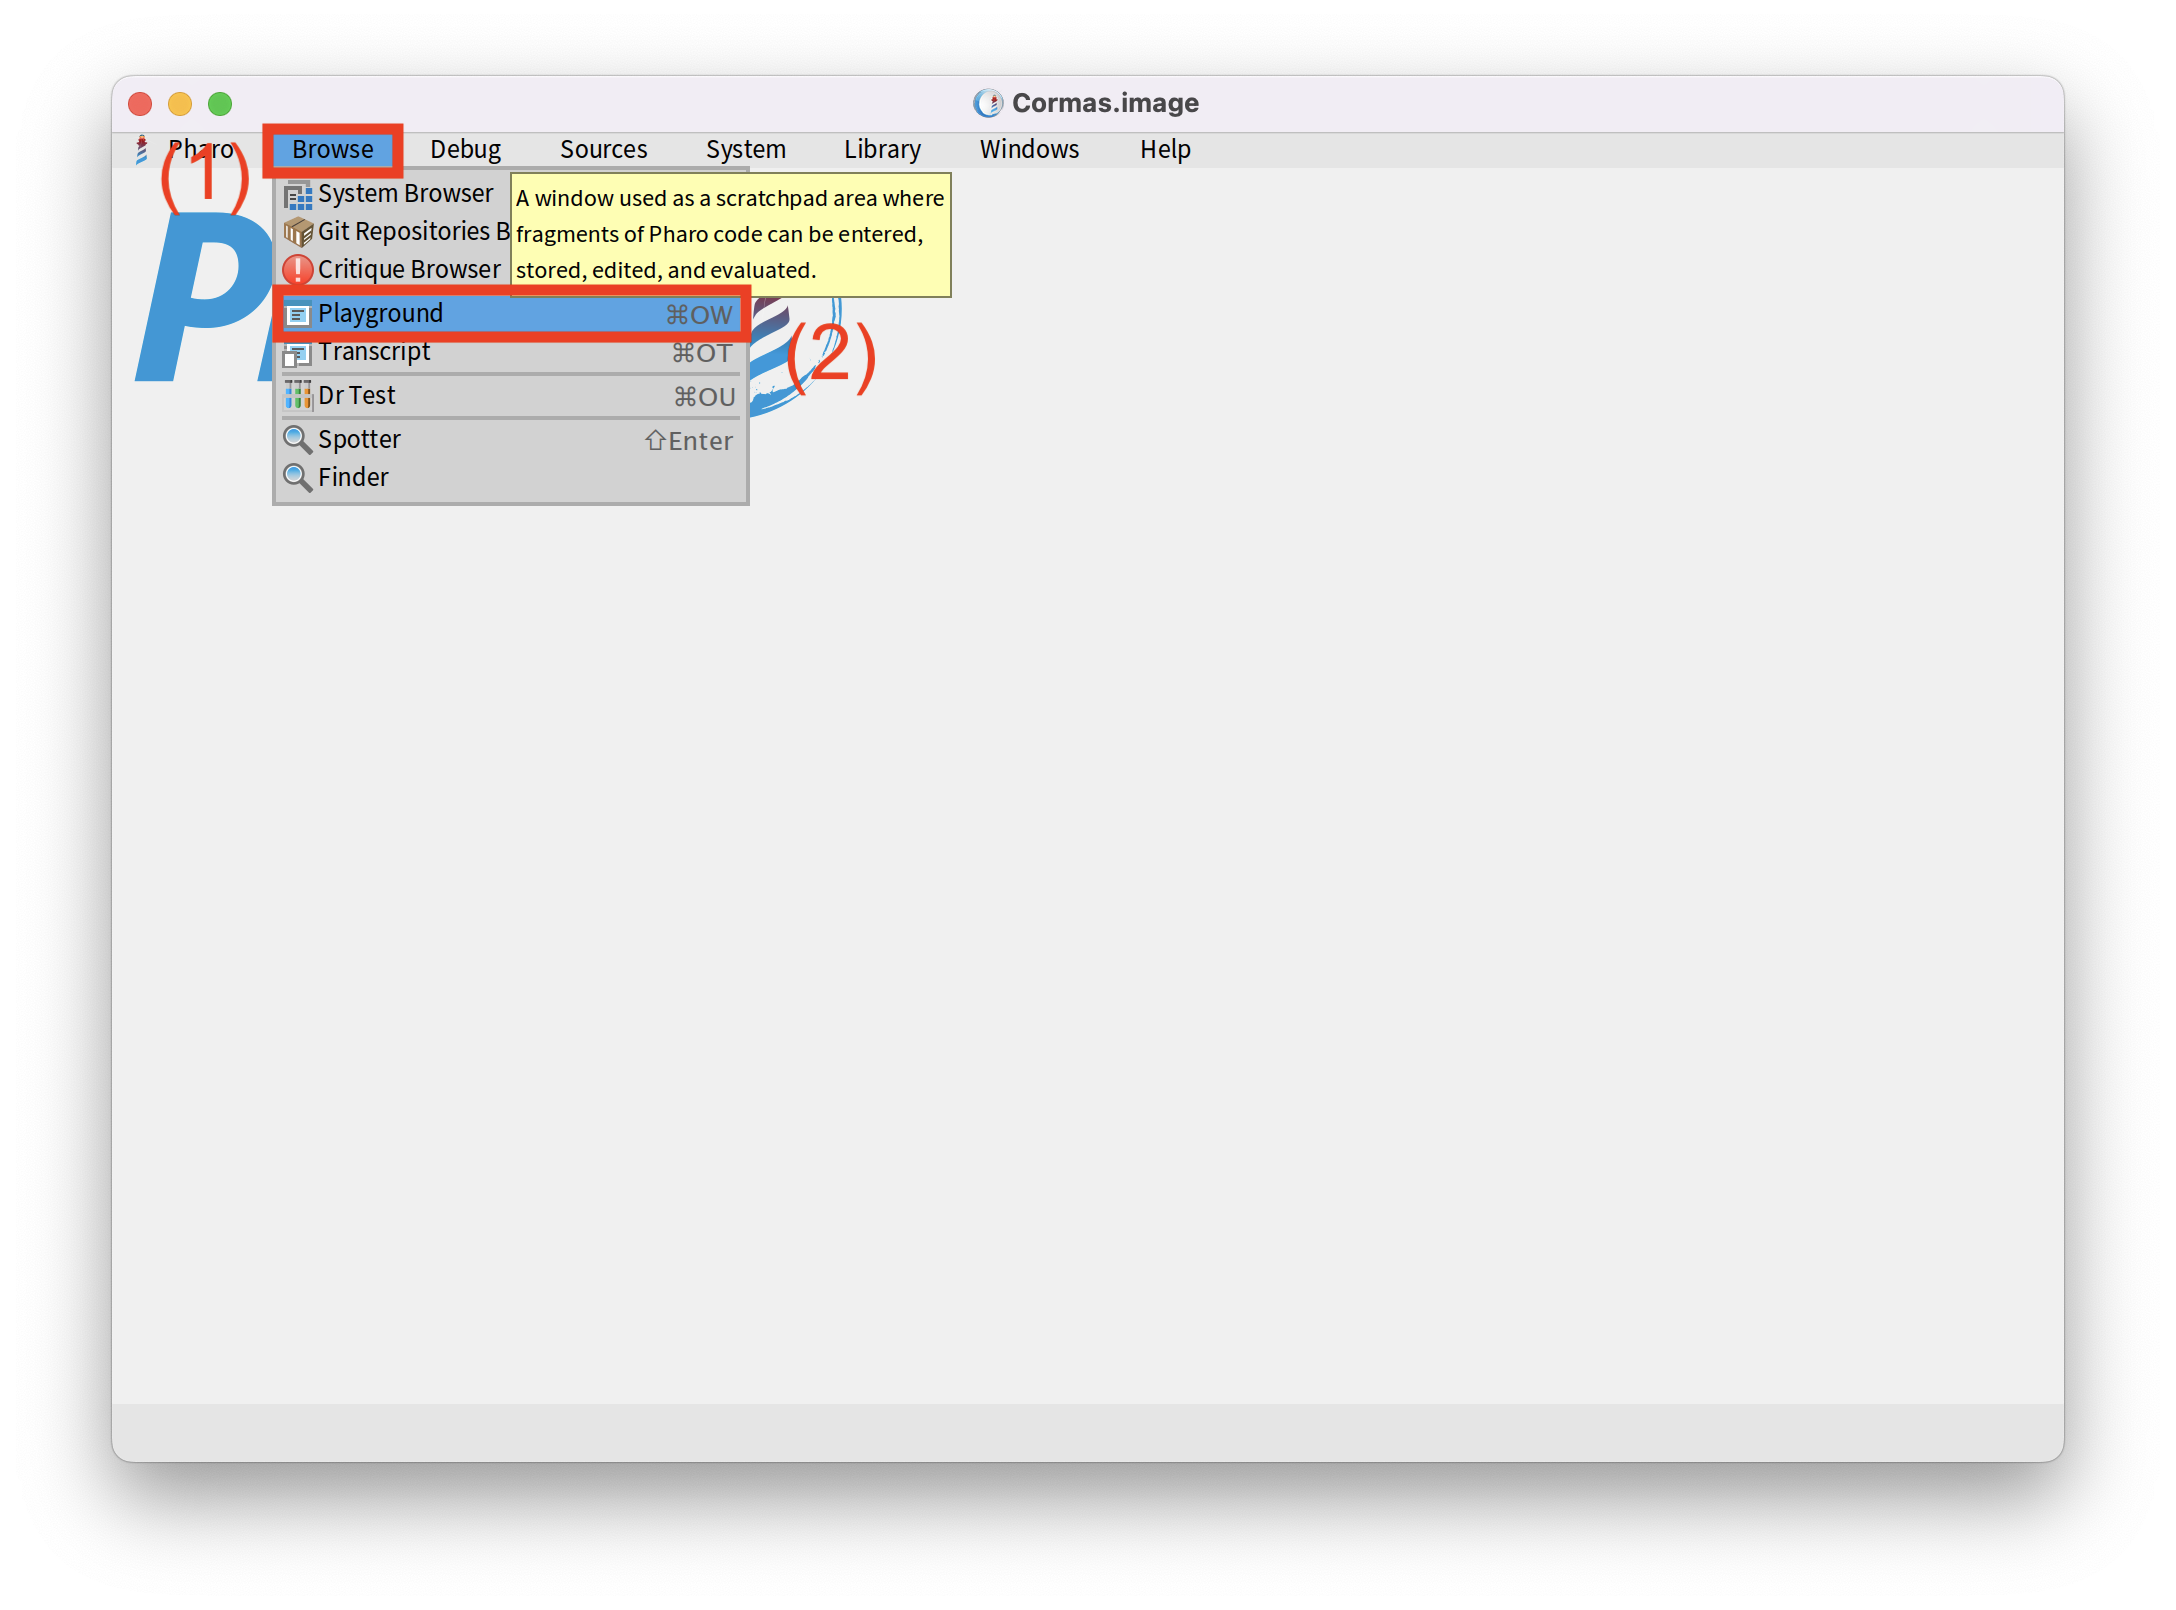
To open the Playground, click on Browse > Playground in the top menu of your image. You can also use the keyboard shortcut Ctrl+OP if you are using Windows or Linux, or Cmd+OP if you are using Mac.
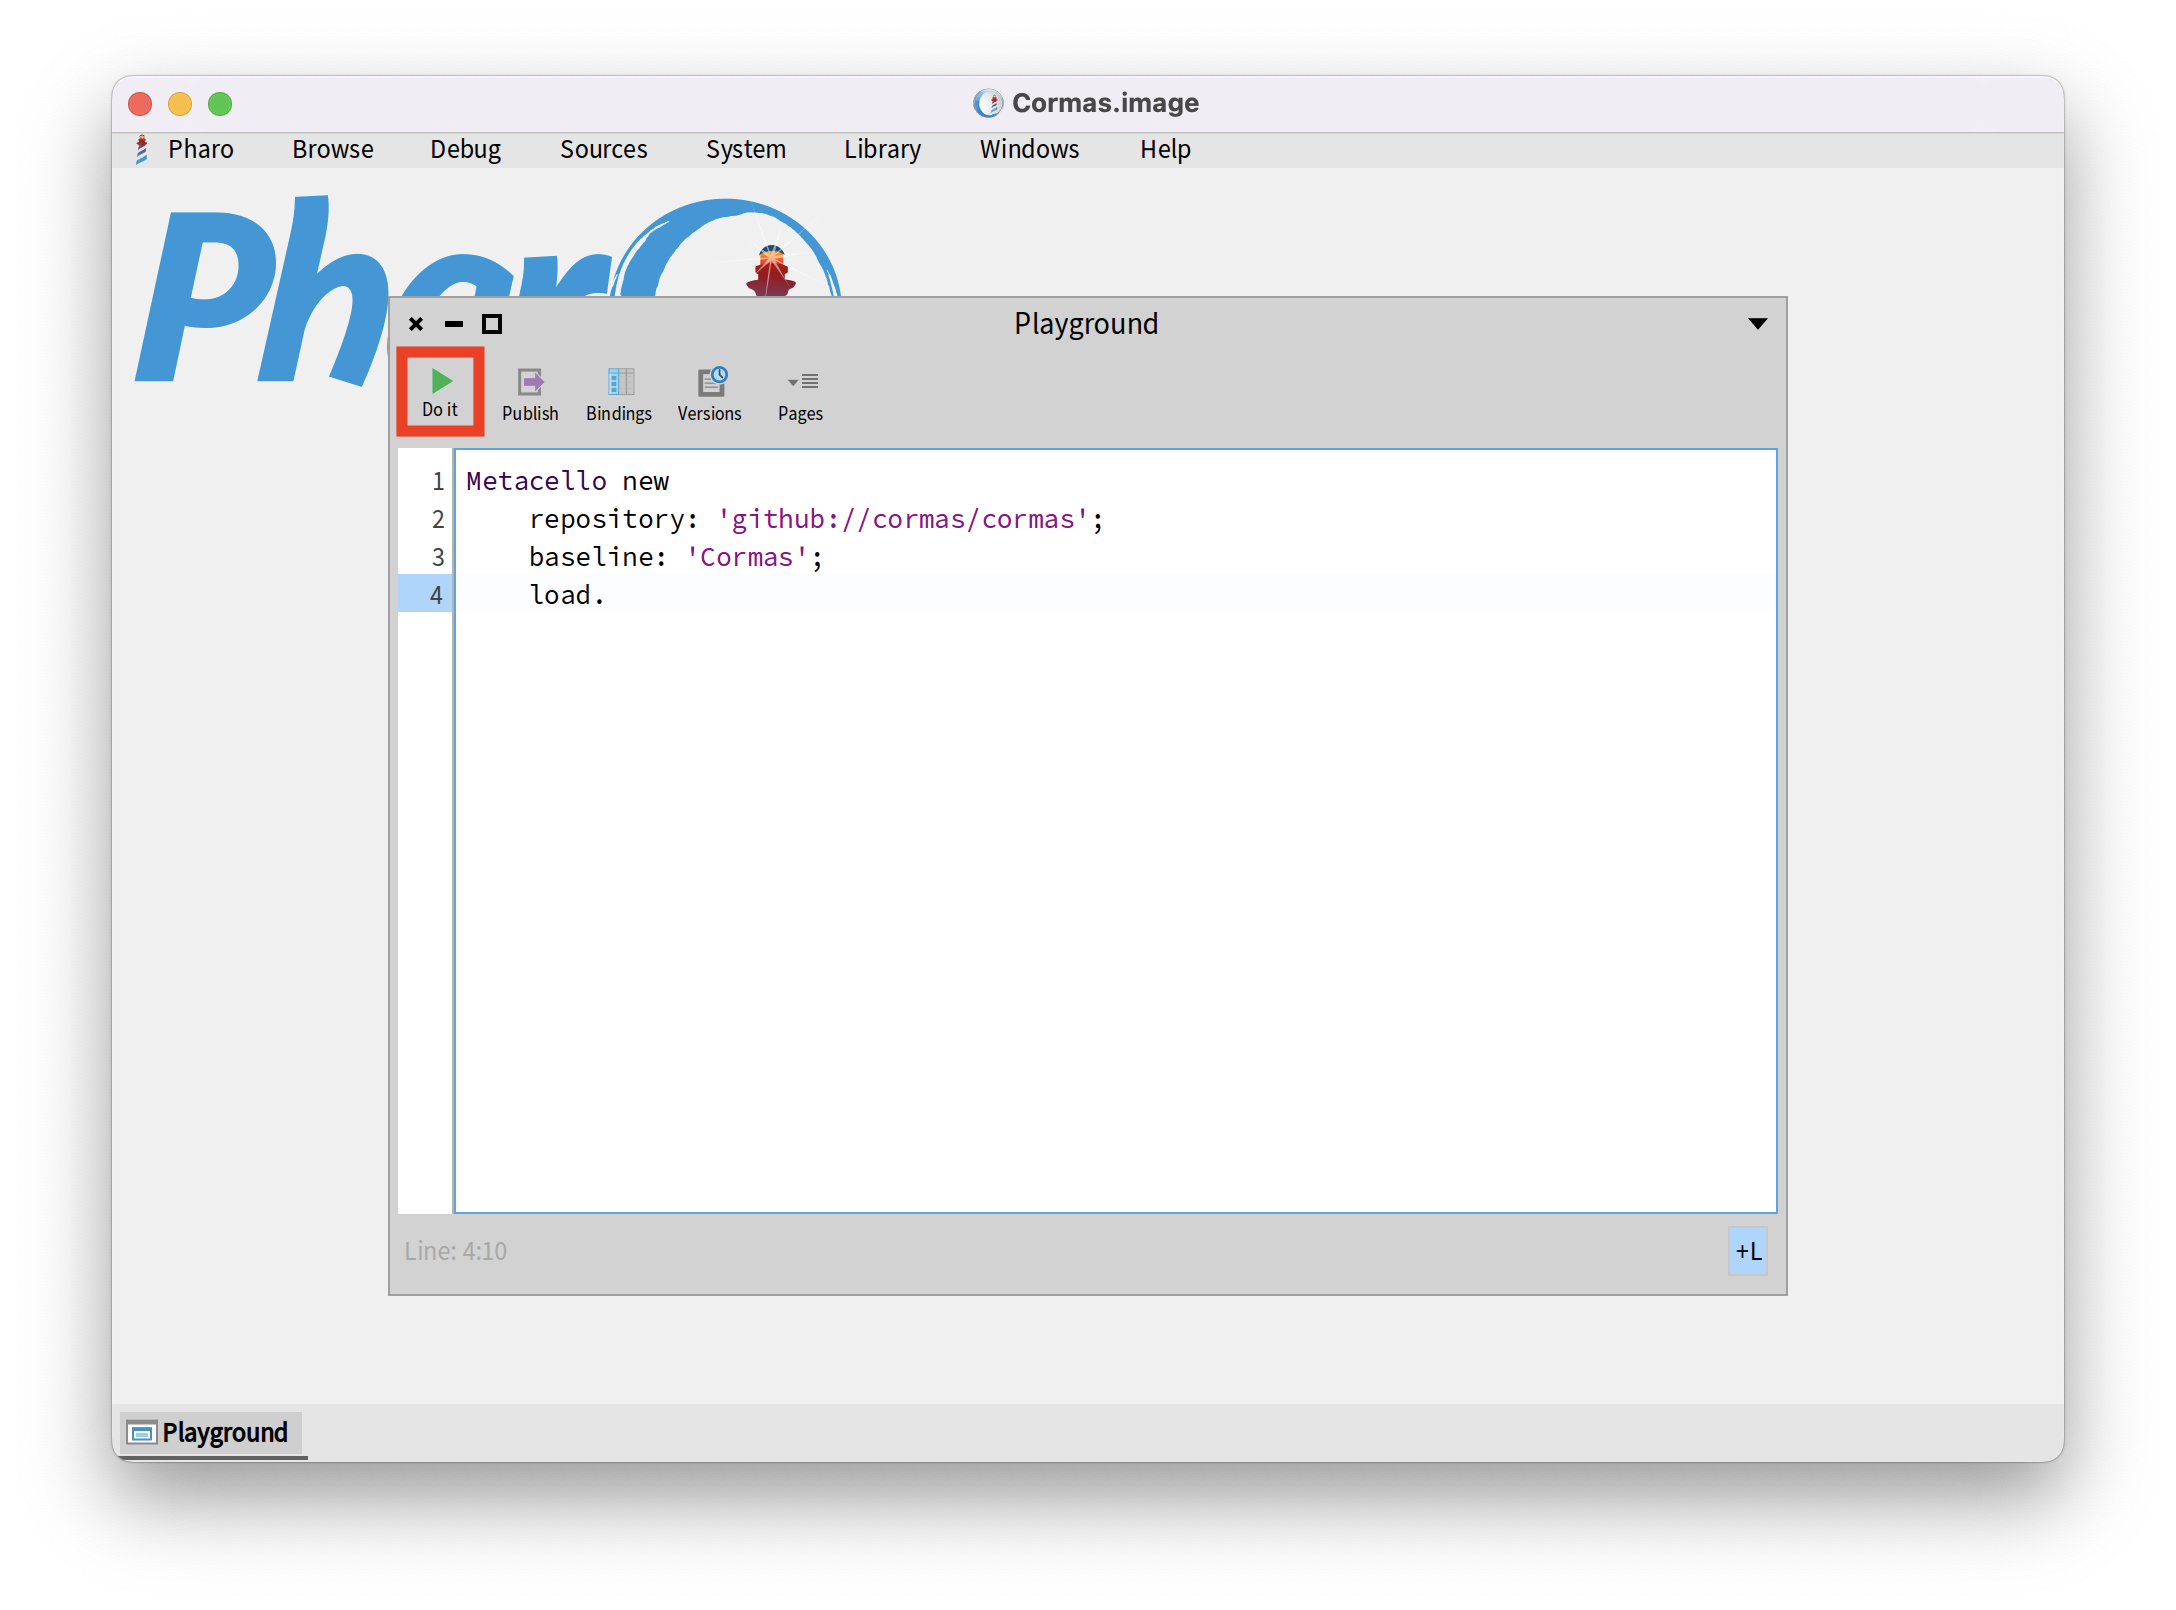
Copy the following installation script into your Playground.
Metacello new
    repository: 'github://cormas/cormas';
    baseline: 'Cormas';
    load.
For now, you do not really need to understand this script, but in case you are interested, it specifies that we want to load Cormas project from GitHub.
The baseline (installation configuration in the repository) is Cormas (BaselineOfCormas).
If you want to learn more about baselines and Metacello, check out the Baselines tutorial on Pharo Wiki.
To execute all the code in your Playground, click on the "Do It" button in the top-left corner, or simply select the entire script and press Ctrl+D (on Mac it's Cmd+D).
The installation can take between a couple of seconds up to a minute, depending on the speed of your computer and the internet connection. Once the installation is over, the Pharo logo in your image will be replaced with the Cormas logo. This means that Cormas ws successfully installed.

We recommand to save your Cormas.image (Menu --> Pharo --> Save).
You can now close the Playground and move on to the Robot-Forager Tutorial where you will create your first model and run the simulation.